Planning a Good Trip
Take advantage of all the editor's features
Last updated 19 days ago
This article outlines the main steps to follow whenever you need to plan a trip using the platform. Following these tips in the order presented here will save you time and ensure a reliable trip for your loved one!
Your greatest asset when helping your loved one is your ability to visualize the entire trip—either because you’re familiar with the route or because you can see it remotely using the imagery we provide.
🎥 Do you prefer a video format?
Set the starting and ending points with precision
SonarVision’s navigation is accurate to the meter thanks to its Visual Positioning System. So, if you can place the destination point exactly at the front door of the destination, you’ll be doing the user a huge favor!
Since routes can be traveled in both directions and locations can be reused, take the time to carefully place all of your user’s locations.
Locations and Points
A location, also known as a destination, refers to any place to which a SonarVision user might want to start a route (building, subway station, bus stop, park, etc.).
Each location has one or more entrances, also known as points, between which a user can choose before starting their trip.
The only locations (represented by a purple outline) that you can edit are your user’s private addresses. An address has at least one entry (represented by an orange marker), which is a geographic point that you can move.
For those with a keen eye, the INJA entrance is no longer located at the point marked below!

In SonarVision, you have several tools at your disposal to place points with precision:
Panoramic images
Use the buttons at the top of the map to open Apple Maps or Google Maps at the cursor (the cross in the center of the map).


The idea is to find the exact destination you want to mark and then identify as many landmarks as possible along the street. These will help you correctly place the destination point exactly where it should be on the map.
In the image below, for example, we’re trying to locate the building’s front door using images from Apple Maps. Possible landmarks are circled in color.

Map Backgrounds
Hover over the button in the upper-right corner of the map to view the different map backgrounds.

Now try to locate the exact entrance of a point based on the landmarks you identified earlier:

Only the OpenStreetMap and Mapbox base maps are available worldwide. The other base maps are available only in certain regions.
The accuracy of the base maps varies greatly (from 5 cm/pixel to 30 cm/pixel), so try all the base maps to find the one that works best for you.
Check the date of the satellite images! Construction work may have taken place recently.
If you’re having trouble placing a point due to a lack of landmarks or poor base maps, see the article Placing a Difficult Point Accurately.
Use waypoints to improve your initial draft
If you’re in a city where sidewalks and crosswalks have been mapped, the hardest part is done! If you’re not sure, check here: Coverage Areas
Otherwise, refer to the article Planning a Route in an Area Without Pedestrian Mapping
Now just let the route planner do the work for you!
Select the route you want to recalculate. By default, it will be displayed alone on the map. Right-click to add a waypoint (black marker) to force the route planner to take a detour.
Customize your loved one’s route however you like! Here are a few examples:
Change streets

Take a different, wider sidewalk

Avoid roadwork
You can avoid roadwork using waypoints!
In Paris, for example, roadwork is shown as yellow dotted lines on the Paris Open Data map.

Fine-Tune the Details
This is the very last step to complete. If you recalculate a route or want to use waypoints, you’ll lose all your changes (see the next section).
The goal is to provide users with the safest and highest-quality route possible.
Eliminating artifacts from the route planner
The route planner uses data available on OpenStreetMap. Sometimes, the way sidewalks and crosswalks are mapped introduces artifacts into the generated routes.
Below is a screenshot of an intersection on OpenStreetMap and the same location viewed with Apple’s panoramic images. This somewhat inaccurate mapping results in a route with an odd shape.
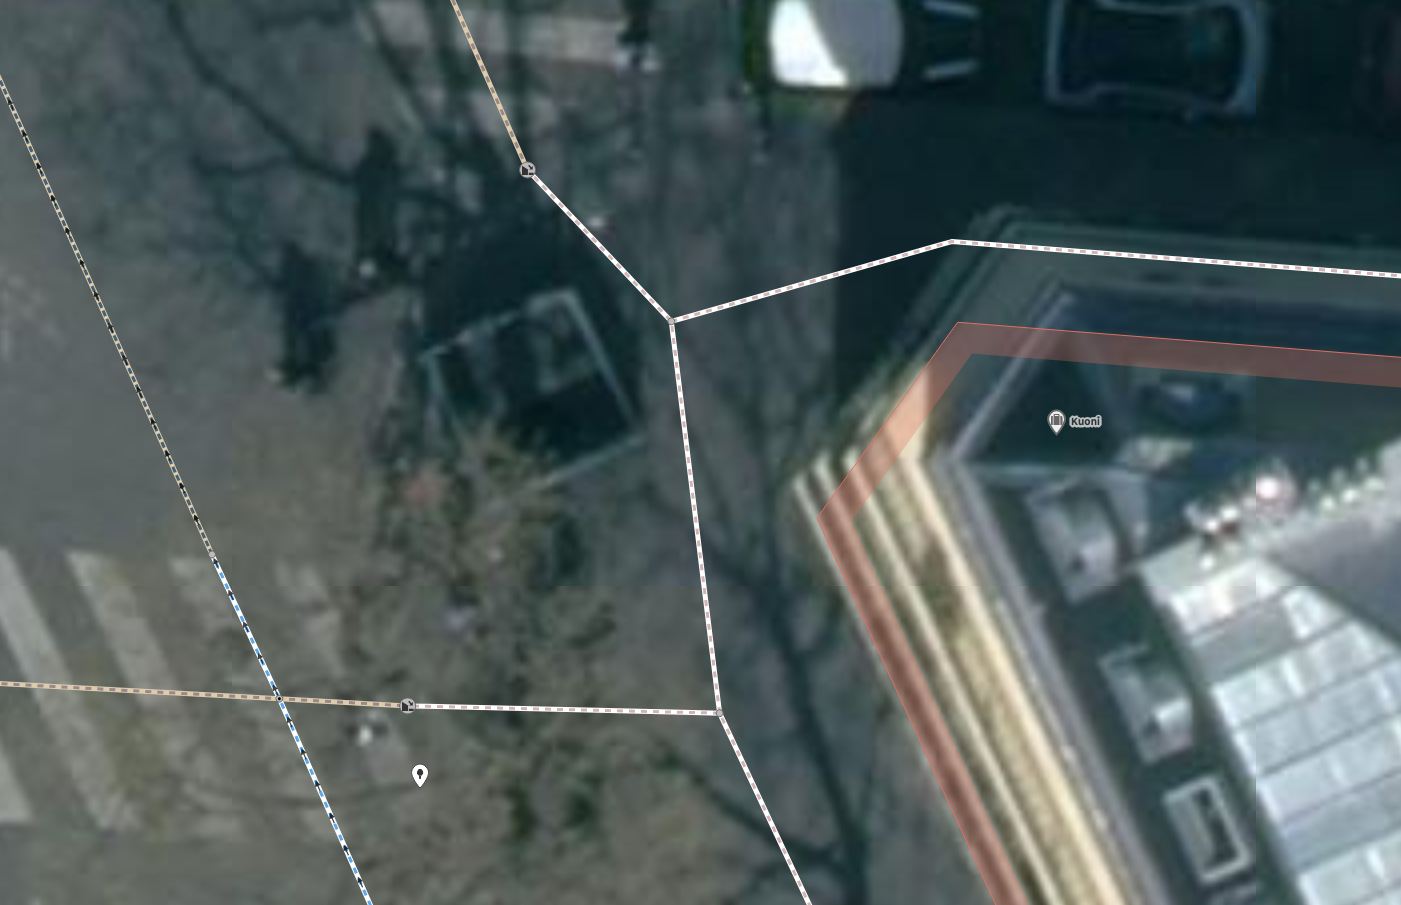

Here is the route generated by the route planner on SonarVision, which takes a sort of “left-right” zigzag path, even though the user could go straight ahead.

We encourage you to correct this type of error by removing unnecessary waypoints and taking into account potential obstacles on the sidewalk. This will prevent your user from taking confusing detours!
With the accuracy of VPS and a route you’ve fine-tuned, it’s possible to guide the user right between the pole and that pesky tree!
Result:

When you notice a problem with OpenStreetMap data like this one, we encourage you to edit it or report it to the community to fix the issue for everyone!
More information here: Improving Route Calculator Results
Avoiding Predictable Obstacles
Although we can’t predict the presence of a trash can on trash day or a car unexpectedly parked on the sidewalk, it’s entirely possible to adjust a route to avoid certain predictable obstacles. Here’s a non-exhaustive list of examples:
Bus stops
Trees and bushes
Poles
Café patios
Roadwork that can be navigated
…
Just take a slight detour as shown below.

Common Problems
Before you start tweaking the details and manually editing a route’s line, be sure to read the following paragraphs carefully so you don’t accidentally delete your own work.
Undo the previous action (Ctrl+Z)
SonarVision doesn’t have Ctrl+Z yet! If you make a mistake, you can click “Undo,” but you’ll lose all the changes you’ve made since the last save!
Save your work regularly! There is no Ctrl+Z in SonarVision yet.
Recalculating the route deletes your changes
When you click the “Recalculate Route” button, a completely new route is generated, and you’ll lose all the changes you’ve made manually.
Unwanted automatic recalculations
By default, as soon as you add, delete, or move a waypoint, the route is recalculated. This is handy when you’re trying to find the best path using waypoints, but it’s annoying if you just want to delete a marker. Fortunately, you can disable automatic recalculation!

Unable to recalculate the route
First, make sure you’ve selected a route to recalculate! Once you’ve selected one or more routes using their checkboxes, the “Recalculate Route” button will appear in blue, showing the number of routes that will be recalculated.

If nothing happens, it might be because you’re not in one of he @Coverage Areas or because the requested route is too long.
If that’s the case, you have the option to calculate a route using paths that aren’t necessarily pedestrian-only (roads, bike lanes, etc.), but you’ll then need to shift the entire route onto the sidewalk.
Unable to see the sidewalk with satellite imagery
Satellite images are supposed to be orthophotos, meaning that every point on the map is viewed from above. If that were the case, the only hidden points would be covered areas.
However, some “satellite” images are actually taken by airplanes flying much lower. This creates perspective issues where, on one side of the street, you see the facade of a building, while on the other, the roof obscures the sidewalk.

The satellite imagery displayed is a mosaic of tens of thousands of photos, so you’ll occasionally see the seams where the different images are stitched together.
Happy mapping! Feel free to share your tips or any issues you encounter at on the forum!
Still need help? Ask the team