Preparing a good trip
For the best SonarVision navigation experience.
Last updated 8 months ago
This article show the tasks to be done in order to prepare a great trip with our online editing platform. Applying these instructions in the correct order will save you a lot of time and ensure a reliable trip for your friend or loved one.
Your greatest asset in helping a SonarVision user is that you can mentally picture the entire route—either because you already know it, or because you can visualize it remotely using the imagery we provide.
🎥 You prefer a video format?
Watch our tutorials on Youtube (work in progress)
Placing the start and finish points accurately
SonarVision guidance is super accurate thanks to its Visual Positioning System. Therefore, if you are able to place the finishing point of the trip exactly on the entrance of the destination, this is incredibly useful to a SonarVision user.
As trips can always be used in both directions, and places are reusable, take the time to position all your user’s places as accurately as possible.
Points and places
Places, also referred to as destinations, designate any place a SonarVision user might want to travel to (building, underground station, bus stop, park…).
Each place has one or more entrances, also called points, which a user can choose between before starting their trip.
The only places that you can modify are called addresses (purple area below). They are private to the user’s account. An address has a least one entrance (represented below by an orange marker) which is a geographic point which you can move around.

Our editing platform has several tools to help you position points accurately :
Panoramic Imagery
Use the buttons at the top of the map to open Apple Maps or Google Maps on the cursor at the center of your screen.


The idea is to find the exact destination you are looking for in the panoramic imagery then to look for as many reference points as possible.
In the image below, we are looking for the entrance door to the building in the center using Apple panoramic imagery. We have highlighted some reference points in color.

Map backgrounds
Hover over the button at the top right corner of the map to show the difference map backgrounds.

Try to locate the exact entrance by comparing the overhead view to the reference imagery:

Only the OpenStreetMap and Mapbox backgrounds are available in the entire world. The other backgrounds are only available in certain regions.
The background’s resolution can vary greatly (ranging from 5 centimeters per pixel to 30 centimeters per pixel), so try them all to find the best one for you.
Check the date on satellite imagery! Construction work could have occured recently.
If you still have difficulties places a point due to the absence of good reference points or bad satellite imagery, see the article Positionner un point difficile avec exactitude.
Use waypoints to improve your first draft
If you are in a city where sidewalks and crossings have all been mapped, the hardest part is over! If you aren’t sure, check here: Zones de couverture
Else, refer to :Préparer un trajet dans une zone sans cartographie piétonne
You can now let the itinerary router do the heavy lifting!
Select the trip you wish to calculate. By default, it will appear alone on the map. Right-click to add a waypoint (black marker) in order to force the trip to make a detour.
Customize the trip as much as you want. Here are a couple examples :
Use another street

Use a larger sidewalk

Avoiding construction work
You can use waypoints to avoid construction work.
In Paris for example, construction work is shown in dashed yellow areas, on the Paris Open Data background.

Refining details
This is the last step of the process! If you happen to recalculate your trip or use waypoints, you will lose any refining work you have done (see the next section).
The objective of refinement is to offer the most secure and reliable trip possible to the end user.
Eliminating routing artifacts
The itinerary calculator uses OpenStreetMap data to calculate your trips. Sometimes, the way sidewalks and crossings are mapped introduces artifacts in the generated trips.
Below, you have a screenshot of an intersection on OpenStreetMap and the same place visualized with Apple panoramic imagery. This awkward mapping will create weird shapes in the resulting trip.

Here is the trip generated by SonarVision’s itinerary router, which has a strange “left-right” chicane, whereas the user could go straight.

We strongly urge you to correct these errors by eliminating useless points and taking obstacles into account. This will prevent the user from having to drift from an optimal trajectory.
With the VPS’ accuracy, and a perfectly adjusted trip, it is possible to guide the user precisely between the pole and that shifty tree.
Here is what that would look like :

When you notice such a problem with OpenStreetMap’s cartography, we encourage you to correct or report it to the OpenStreetMap community in order to fix the problem for everyone!
More information here: Améliorer les résultats du calculateur d'itinéraire
Avoid known obstacles
It isn’t possible to predict the presence of a trash can on garbage collection day or a car deviously parked on the sidewalk, so just try to stick to the middle of the sidewalk most of the time. However some of the following obstacles can be predicted, and are often mapped or imaged which allows you to avoid them :
Bus stops
Trees and bushes
Telephone poles
Tables and chairs at cafés
Construction work
…
All you have to do is translate the path to avoid them like so :

Common mistakes
Before getting into the nitty-gritty of path refinement, here are a couple common mistakes to avoid.
Undo action (Ctrl+Z)
SonarVision does not yet have a Ctrl+Z undo action! If you make a mistake, you can click on “Cancel”, but you will lose all modifications since the last time you hit Save.
Save you work regularly! There is NO Ctrl+Z undo action in SonarVision.
Recalculating your itinerary erases any refinements
If you click on “Recalculate itinerary”, a brand new trip is generated and overwrites any refinements you added manually. Save your work regularly!
Unwanted trip recalculations
By default, any time you add, delete or move a waypoint, the itinerary is recalculated. This is useful when you are trying to find the best trip with waypoints, but it’s a pain if you accidentally move a waypoint that is in your way! Fortunately, you can deactivate automatic trip recalculation :

Cannot recalculate trip
Start by checking that you have correctly selected the trip you wish to recompute. Once you’ve selected one or several trips with the tick boxes, the button “Recompute trips” will appear in blue with the number of trips selected.

If an error appears, you may not be in one of the covered areas :Zones de couverture des technologies SonarVision
In that case, you have the option to calculate a trip which doesn’t use only pedestrian ways (roads, cycling lanes), but you will have to move the entire path to the sidewalk.
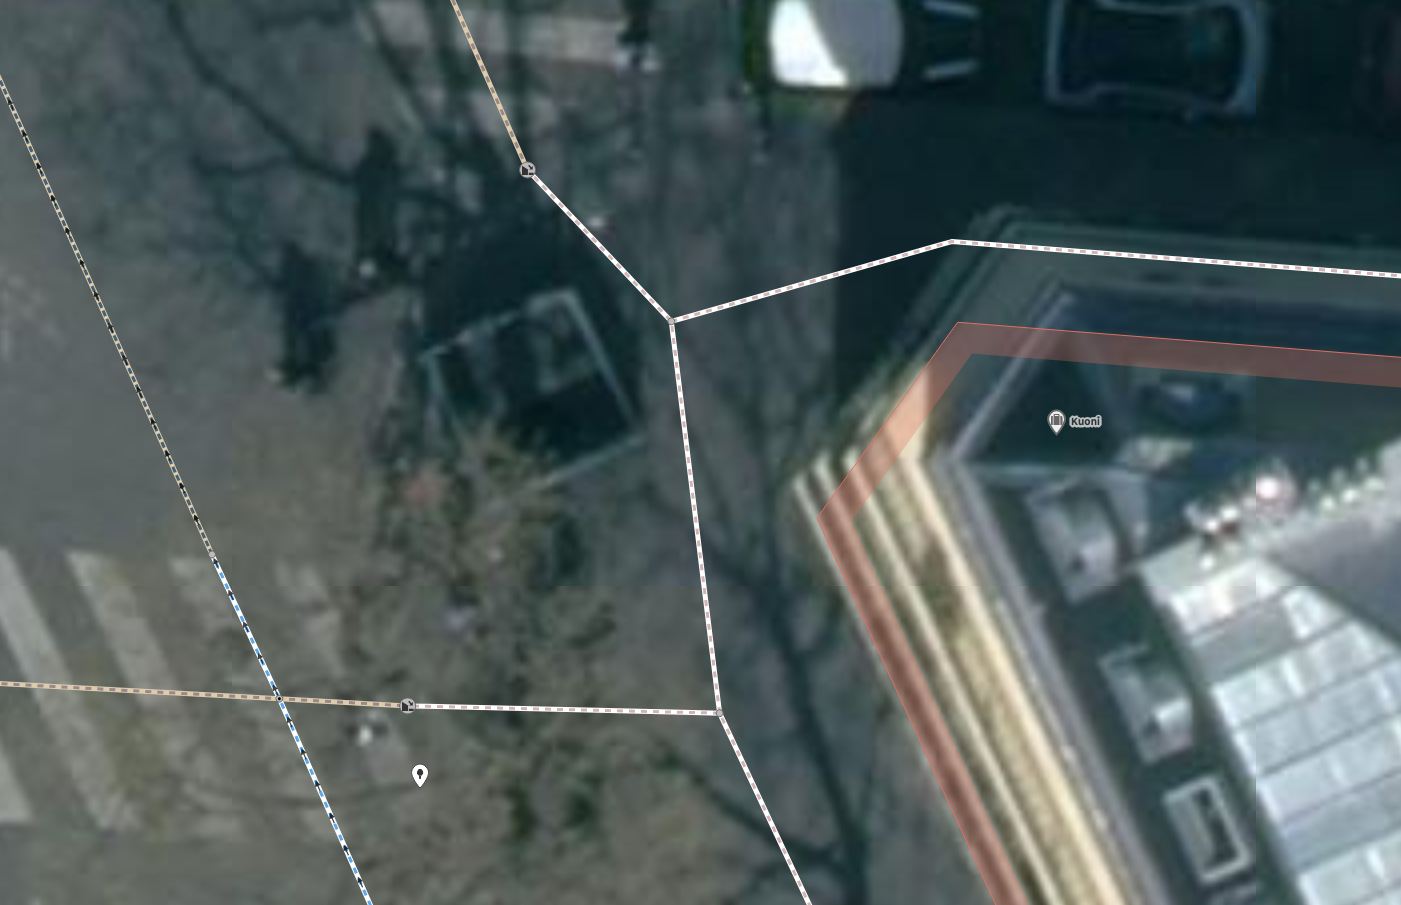
Buildings are hiding the sidewalk in satellite imagery
Satellite imagery is supposed to be orthographic, which means that you should see each point exactly from above. If that were the case, only covered areas would be hidden.
However, certain images are photographed by low-flying aeroplanes, like the one below, which introduces perspective problems. One one side of the street, we see the building’s facade, on the other, the roof covers the sidewalk.

The imagery is a collage of tens of thousands of such photos, which means you will occasionally see some stitching!
Good luck with trip preparation! Share your tips or any problems you encounter on our forum!